How to create an ERC-20 Token on Avalance (using OpenZeppelin)
In this guide, you will learn about how to create your own ERC-20 token on Avalanche Network. The main focus here is deploying a Solidity smart contract on the Avalanche blockchain. Let’s see how it’s done.
1. Prepare your MetaMask
First, you’ll need to connect to FUJI Testnet on Avalanche C-Chain*. For that, you’ll need a custom RPC set up in your MetaMask. You can still stick to Mainnet if you wish to use it.
*The C-chain is essentially an instance of the Ethereum virtual machine that’s powered by the Avalanche consensus
In the network selection window, choose Custom RPC.

Now for the credentials. In this guide, we’ll be using Fuji Testnet, but you can also use the Mainnet credentials if you wish to stay there.
Use the following in the network fields:
Network Name: Avalanche C-Chain
Symbol: C-AVAX. Mind that ticker verification data is sometimes unavailable on MetaMask, so make sure you enter it correctly, as that will impact the conversion rates.
For Fuji Testnet:
New RPC URL: https://api.avax-test.network/ext/bc/C/rpc
ChainID: 0xa869
Explorer: https://cchain.explorer.avax-test.network
For Mainnet:
New RPC URL: https://api.avax.network/ext/bc/C/rpc
ChainID: 0xa86a
Explorer: https://cchain.explorer.avax.network
Once done, you’ll be taken to a page like this one:
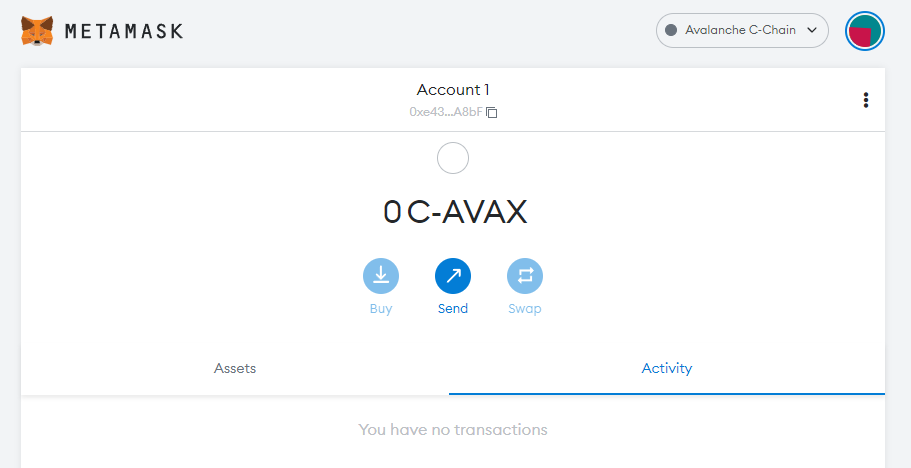
Now it’s time to get some testnet C-AVAX tokens.
2. Getting testnet tokens
To work on the C-CHAIN, you have to have some testnet C-AVAX tokens. The tokens are free, but they can’t be traded, since they are created for development purposes only and don’t hold any real value. To get thm, head over to the faucet website. 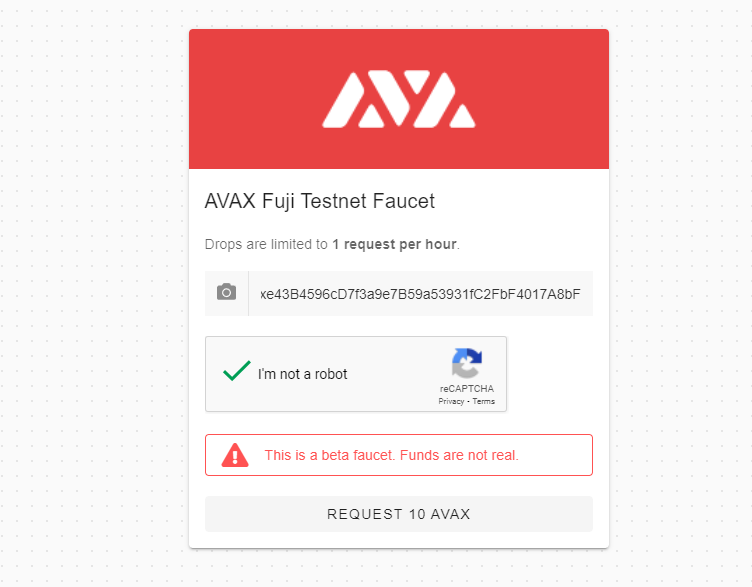
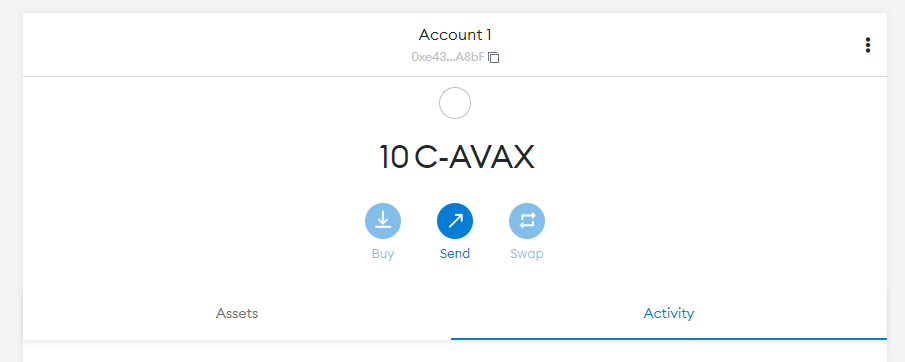
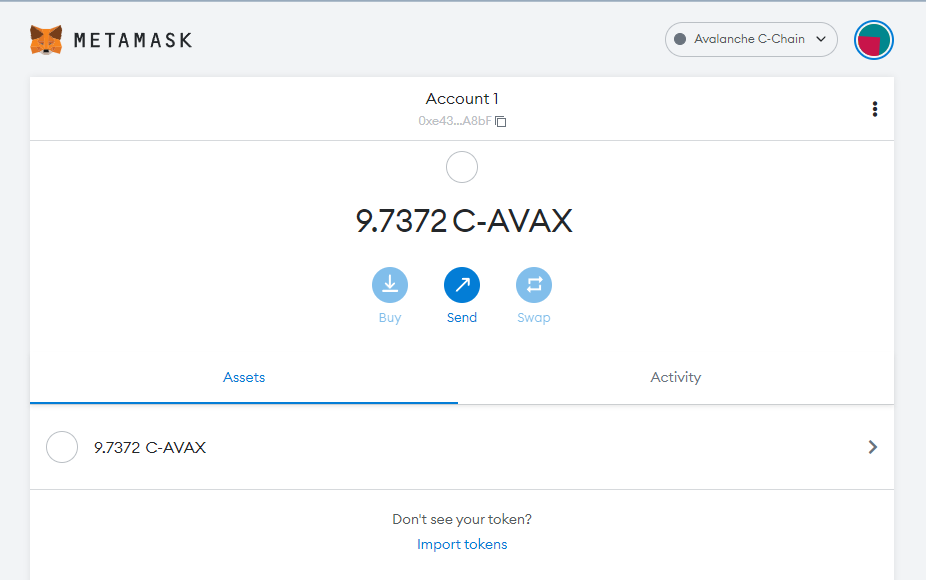
Open your MetaMask again, refresh the page, and you’ll see the 10 C-AVAX tokens on your balance.
3. Creating the token itself using Remix
Now for the main part — creating and deploying our new contract.
For that, we’ll be using Remix. head over to the Remix main page, and choose the Solidity language.
Next, go to the Workspaces section and create a new file in it. Let’s name this one “avaerc” for example’s sake.

A new window will open, and the new file will be instantly available in the browser window.
We don’t have to code anything here as we’ll be using an ERC-20 OpenZeppelin contract. In the coding window, simply paste the following:
Now it’s time to navigate to the Solidity compiler section. Once there, press “Compile avaerc.sol” and go back to the file explorer.
Navigate to the “presetes” folder, and find a file called ERC20PresetMinterPauser.sol. Click the file to select it, and then head to the Solidity Compiler section once again.
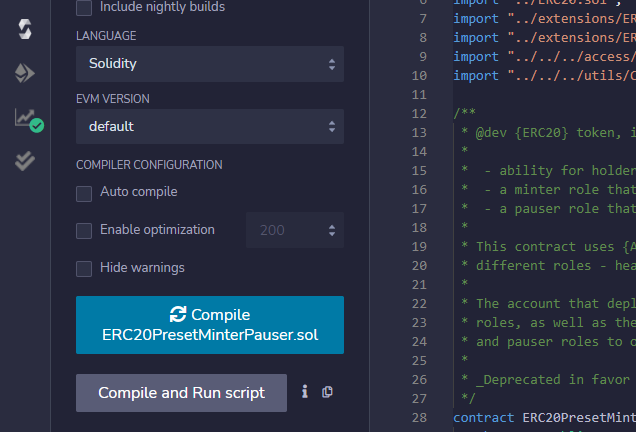
You’ll see the name of the file in the “Compile” button. Press it, and wait for the process to complete.
Important: Your compiler version ideally should be higher than that of your source file. You can ignore this and proceed if you didn’t make any changes to the source file.
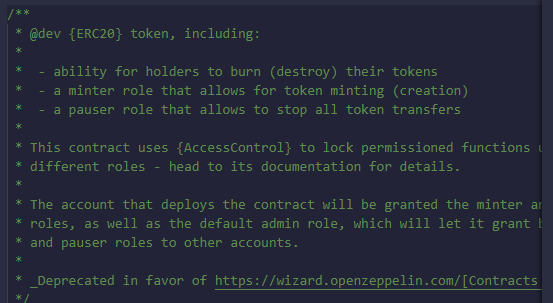
So here’s what our smart contract looks like:
- It allows holders to burn/destroy their tokens
- Minters can mint/create new tokens with it
- A ‘Pauser’ is enabled to stop all token transfers
This contract already has everything necessary for its deployment, so no further coding or tweaking around is necessary on our part.
To proceed, head on to the “Deploy & run transactions” section located just under the Compiler icon.
4. Deploying the contract
Now for the key bit: deploying the contract itself. For that, we need to choose the environment first.
We’ll go for Injected Web3 in this example.
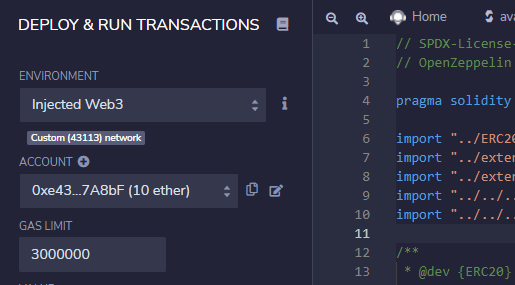
You’ll be asked to connect to your MetaMask wallet. Sign the transaction, and you’ll see your connected account with the 10 test tokens from the faucet available here.
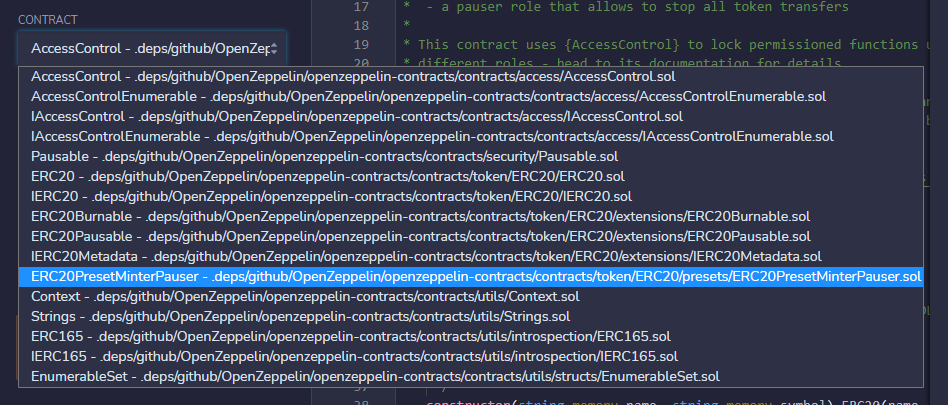
Now head on to the “CONTRACT” field, and choose the file ERC20PresetMinterPauser.sol — our main contract.
Before we proceed with deployment, click the on the arrow next to the “Deploy” button and in the drop-down menu, type in the following symbols:
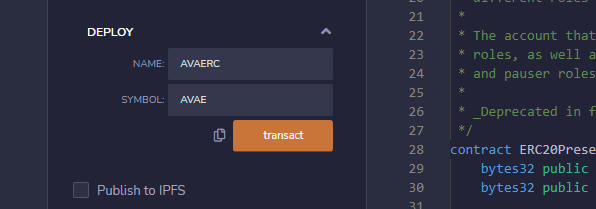
NAME — the name of our token (AVAERC)
SYMBOL — the ticker (AVAE)

Click “transact” and then confirm the operation in your MetaMask wallet. You’ll need to pay a gas fee using the test tokens from the faucet.
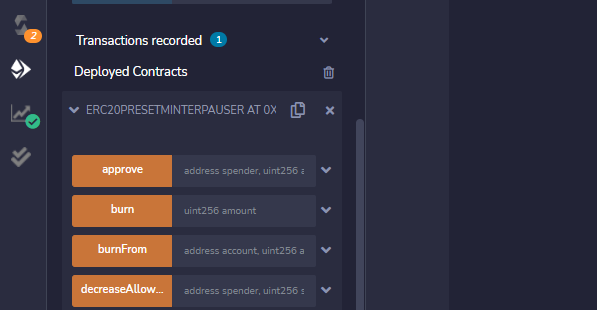
Once done, the deployed contract will be visible in the same window.
Now head over to the bottom-right section of the page, and find the Debug field.
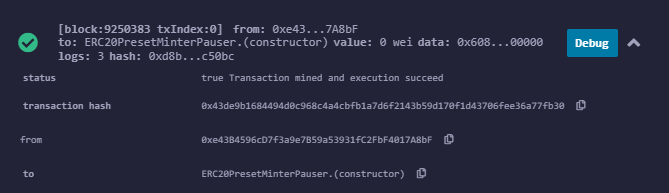
In it, you’ll see a field with your transaction hash and other details. Copy the hash, and go to the SnowTrace explorer.

Paste your transaction hash in the search bar, and click “Search”.
You’ll see a transaction overview, which should say “Success” and have all the hashes and addresses listed.
Congratulations — you have deployed your smart contract! But before we celebrate, let’s mint some of those ERC-20 Tokens.
5. Mint the tokens
Head back to the Deploy and run transactions section in Remix and click the arrow next to under “Deployed contracts”. You’ll see a drop-down menu with all kinds of functions for this contract.
What exactly each function entails — you can find out in the OpenZeppelin documentation. For now, let’s focus on what can help us mint the tokens.
In the drop-down menu, find the “mint” button and click on the arrow next to it. You’ll see another drop-down menu with two fields: “to” and “amount”.

In the “to” field, paste the address you’re going to mint the tokens to — in our case, it’s our Ethereum wallet address — and enter the amount of tokens to mint.
Mind that the amount should be in WEI — the smallest token unit on the Ethereum blockchain. To calculate the amount you should enter here, consult with the Etherchain unit converter. For example’s sake, let’s make it 1 Ether’s worth, i.e. 1000000000000000000 WEI.
Enter the amount, press “Transact”, and confirm the operation in Metamask.

If successful, the transaction will now be displayed in the bottom right, next to the Debug section. You can copy the txHash and verify it in the SnowTrace explorer again.
6. Import your tokens to MetaMask
Even though the tokens are minted, they won’t be immediately visible on the MetaMask balance. To fix that, you’ll need to import them.
Open the Assets tab in your MetaMask and click “Import tokens” at the bottom of the page.
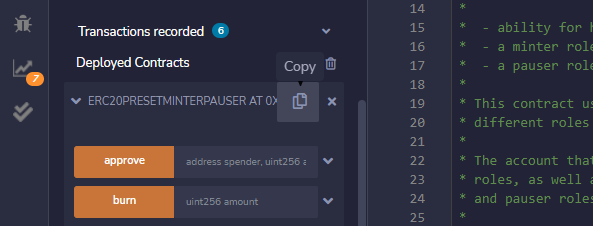
Then go back to the “Deployed Contracts” tab in Remix and copy your contract address.
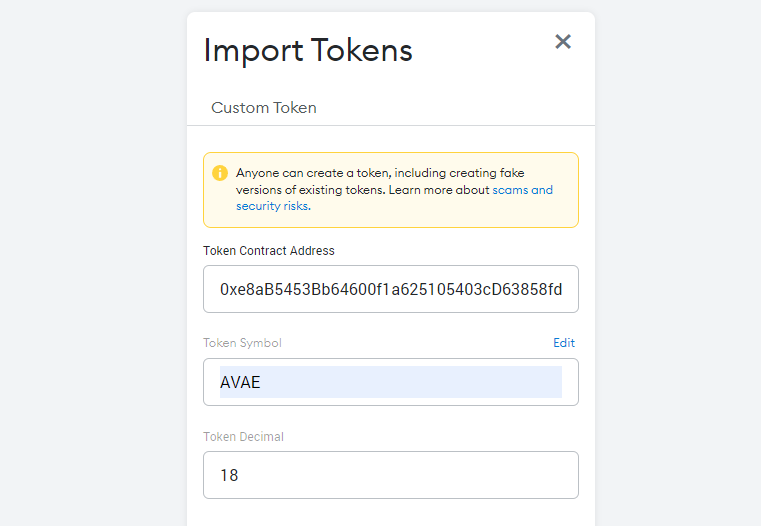
In the MetaMask import window, paste the contract address and their ticker — in our case it’s AVAE; leave the decimals as they are.
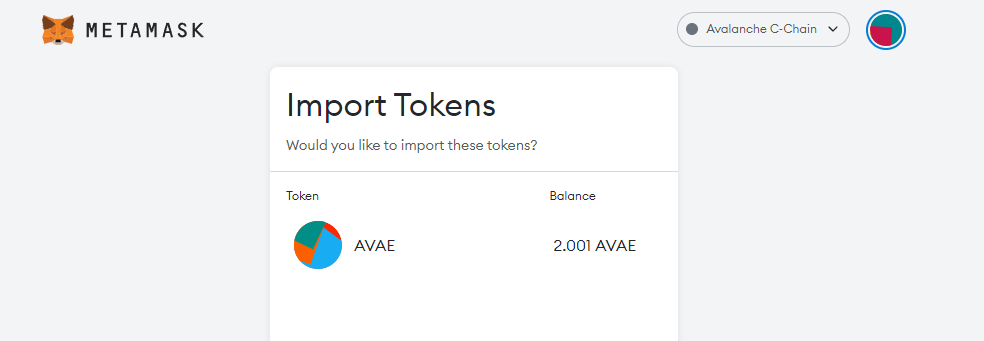
After that, you’ll see the newly-minted ERC-20 tokens in the import preview.
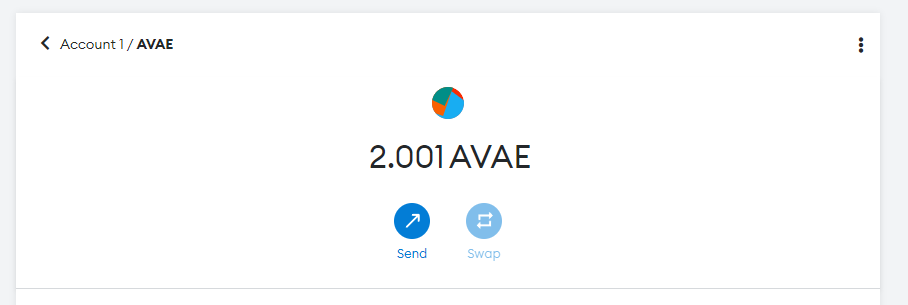
Click Import, and voila — your tokens are now visible on your MetaMask balance.
That’s it — you have successfully created your own ERC-20 token on Avalance! If you found this guide helpful, make sure to check out more useful guides and news from the BC Team.